Create, Share and Track Web-based Collateral
Monitor interactions with any digital materials and content you share.
Dindo Fernandez
Last Update één jaar geleden
Easily embed a trackable website link (or URL) within your client communication using Regie.
Many Regie users leverage this feature to stay in tune with the levels of engagement for any digital content or web-based materials shared and distributed through a hyperlink.
Commonly shared online collateral includes, but is not limited to:
- Links to websites; or specific product and service landing pages
- Online resources such as case studies, infographics, white papers, and blogs
Trackable URL insights include:
- Total # of link views
- Total # of link downloads
- Date and time the link was last viewed
- The name of Regie User(s) sharing the URL
- Instant Email notifications from Regie whenever the URL is viewed (Learn more on those here)
This article covers:
1. Creating a trackable URL
2. Sharing a Trackable URL
3. Sharing a previously used URL
So let's get started!
1. Creating Trackable Website URLs
1. From the left side navigation menu in the Regie platform, expand your Brand Kit and click Collateral.
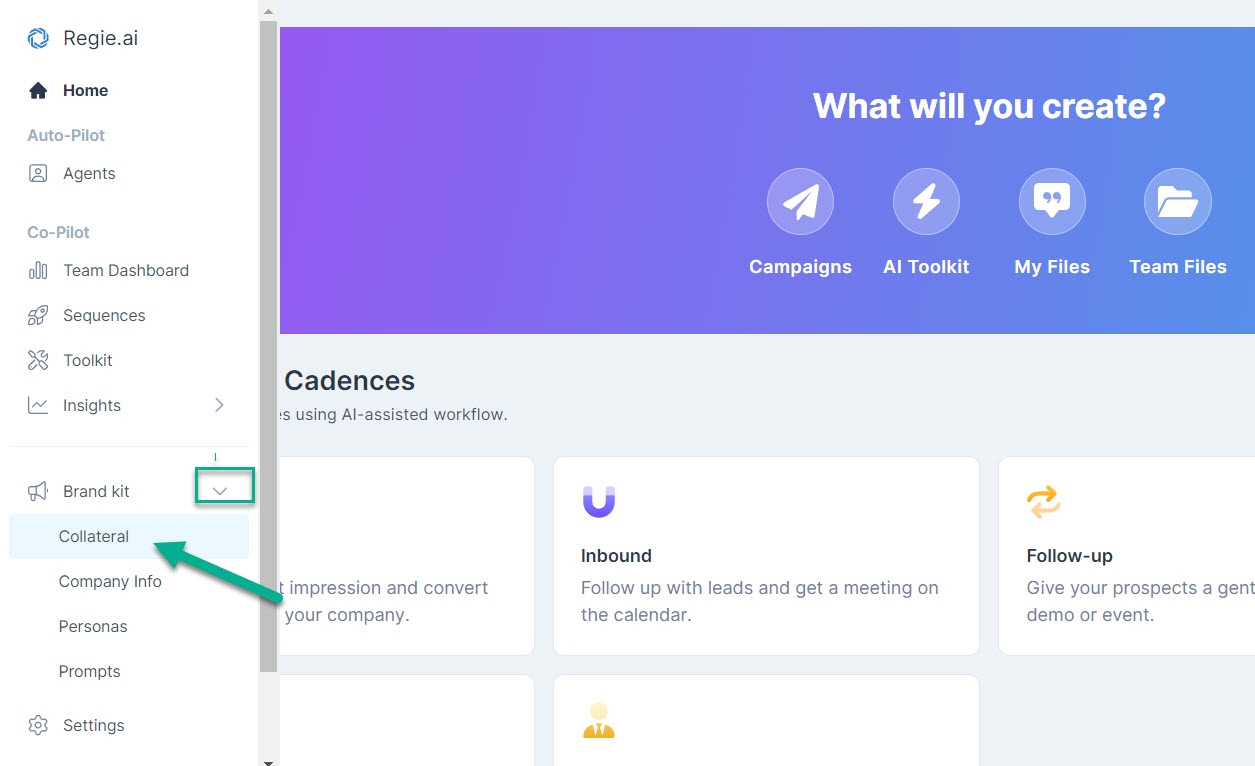
2. While in your Collateral Library decide where the link should be added and who should have access.
If this website link should remain private to you keep "My Files" selected at this step.
If this link should be publicly accessible to the entire team select "Team Files" at the top of the page instead.

Quick Tip: Most Regie Creators select "Team Files" at this step to make collateral publicly accessible for all Users. This way, once created, other Regie Users can easily access the link from the Collateral Library, which is accessible via the Regie platform and Regie Chrome Extension.
Of course, choose the level of access that works best for your content-sharing needs!
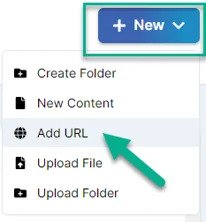
3. Select the "+New" button on the upper right side of the page. Select "Add URL" from the drop-down menu.
4. Next, add the New URL link to the Content Library. Within the New URL pop-up window:
- Provide the URL Name
- Apply any relevant Tags and/or indicate a Persona to associate the online resource/asset with
This step also aids in overall Content Library organization and makes filtering for assets that are meant for certain ICPs a breeze!
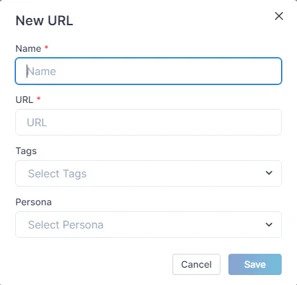
Press Save once complete.
5. After the asset is successfully added to the Content Library you'll immediately see it within your Content list.
This newly created URL can now be accessed and shared with others from the Content Library, which is accessible across the Regie Platform and Chrome Extension!
2. How to Share a Trackable URL
Now that the Trackable URL is available for use in the Content Library, we'll walk you through how easy it is to share.
Let's begin...
1. Within the Content Library, locate the URL you wish to share.
2. Once found, hover your mouse over the file to reveal the content's Quick Actions Icons.
These Quick Actions will automatically appear under the "Last Modified" column. See the image below:

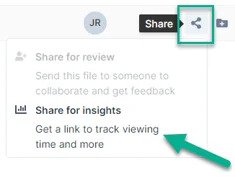
3. Select the "Share" button from these Quick Actions.
4. Next, from the dropdown menu, select "Share for insights".
5. Regie will then display a Share this URL window and automatically provide tracking and sharing options for the New Custom URL Link.
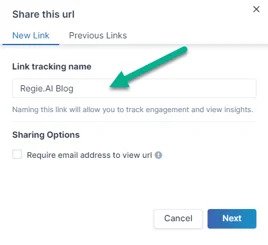
6. As shown above, provide your "Link Tracking Name" for the URL.
By default, Regie will pull in the name of the URL as it appears in the Content Library, but the link tracking name can be customized here.
Heads up: This Link Tracking Name will appear as a clickable text once shared with others from the Content Library.
Therefore, when customizing, best practice is to input a Link Tracking Name that can be public facing.
7. Within the Sharing Options, you have the added option to Require the recipient to input their email address in order to view the URL link.
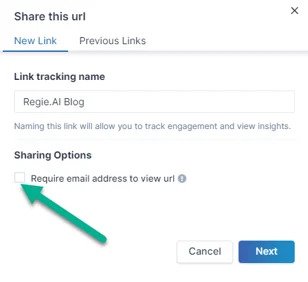
Things to keep in mind: When employing this URL Sharing Option, remember that requesting an email to view an online resource creates a barrier for others to quickly access an online resource.
Since the recipient must enter their email address to view, the upside to this feature is the ability to track specifically who has opened the link and shares those insights instantly with the link's creator.
Therefore we recommend leveraging this for warmer prospects, existing customers, or patrons.
8. Select "Next" in the bottom right of the Share this URL window when you're ready to move on.
9. Regie will then generate the unique URL tracking link to copy and paste into your desired outbound content.
Press Copy Link to add the link to your computer's clipboard.
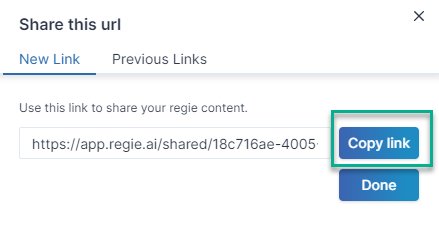
10. Press Done to close the window.
11. Last, paste your custom link to the URL into the body of the content you wish to share. And you're done!
See the example below of the URL link copied and pasted into the body of an email:

3. Sharing a Previously Used URL
Sometimes, the perfect URL link is already available in the CMS that you or someone else previously set up.
In this case, skip creating a brand new URL altogether and instead leverage the Previous Links section to reuse a link, which saves you time and effort.
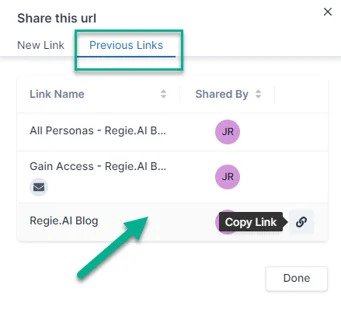
Clicking Previous Links at the top of the window shows ready-to-use URL links, previously created by you or other Regie Users.
This menu further highlights whether the URL link requires the recipient to enter their email in order to access the resource.
This is indicated by the small mail icon next to the Link's Name.
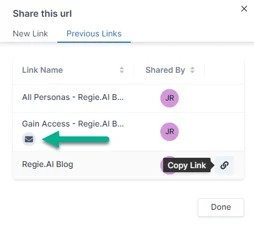
1. To leverage any previously used link, hover your mouse over the Link Name row to reveal the "Copy Link" icon.
2. Select the Copy Link icon.
3. Regie will then automatically add the link to your computer's clipboard.
4. Simply paste the custom link into your desired content and you're done!
