Persona Builder: How to Manually Create Personas

Jennifer Rice
Last Update 2 years ago
A Buyer Persona is a detailed profile of the sort of person that fits your target audience or ideal customer.
Establishing your Buyer Persona in Regie opens the door to a suite of helpful features such as content organizing, simplified campaign creation, and personalized messaging in an instant with Regie's powerful Rapid Writer tool.
See how to set up your Personas in Regie using the Persona Builder below!
Quick Tip: Whether you already have detailed personas or are just starting out, we encourage you to think holistically about your Buyer Persona(s) and the types of messages you currently send to your prospects.
Before setting up Personas with the Persona Builder, challenge you and your team to consider the following: "Is there any differentiation or similarities in the context of messages sent to our prospects?"
Specifically, is there a difference in value proposition based on the following verticals?:
- Job Title
- Level of Seniority
- Department/Job Function
- Industry
- Company Size
These insights will assist you in deciding the number of Persona profiles necessary, how precise they should be, and if pain points and value propositions must be distinct for each Persona individually or can be shared across several.
For additional Persona planning resources feel free to the following article: Questions to Consider When Creating Personas
How to Create Personas Manually
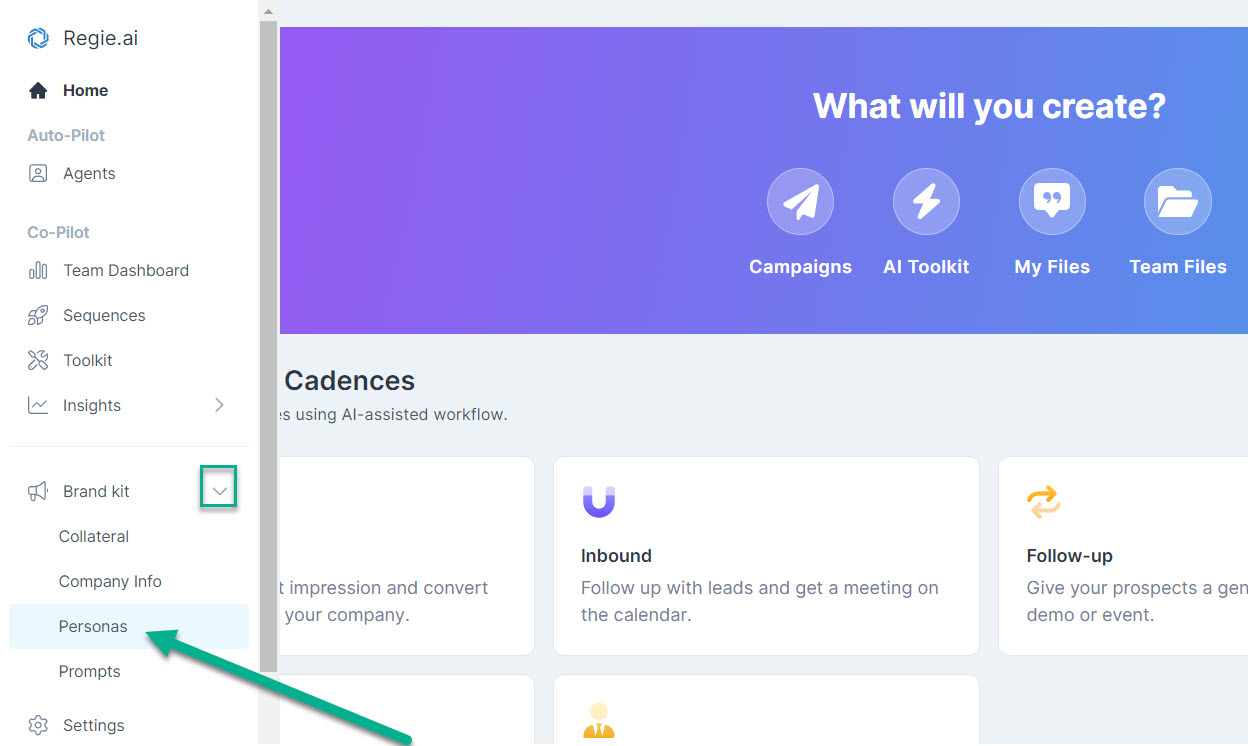
1. From the left-side navigation menu in your Regie platform, click to expand your Brand Kit and select Personas.
2. Select the +New Persona button located on the upper right corner of your Personas page.
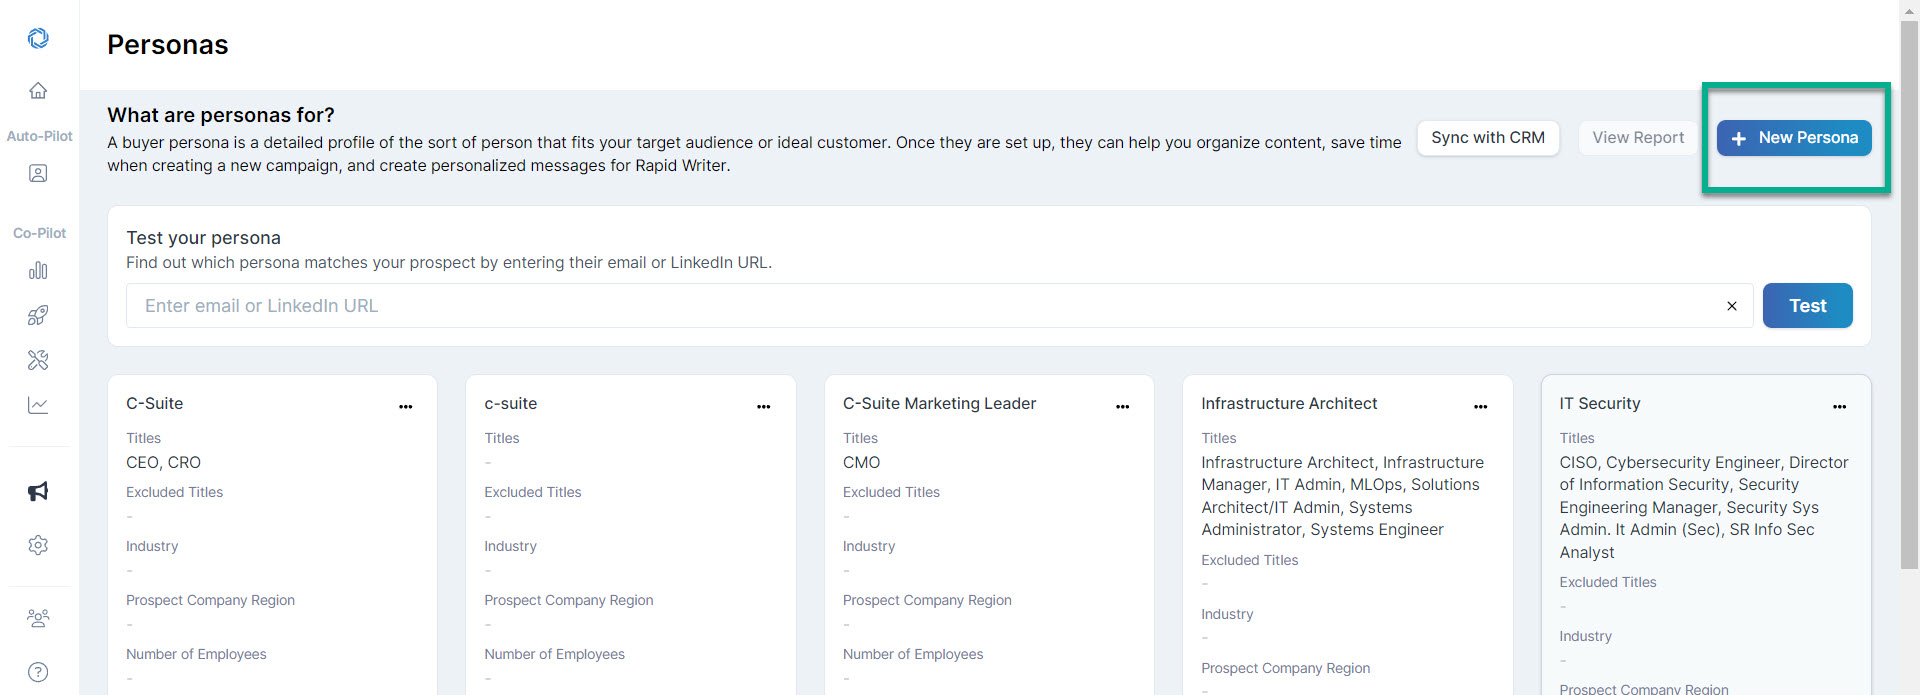
This action automatically surfaces the "Create Persona" window, as shown in the image below.
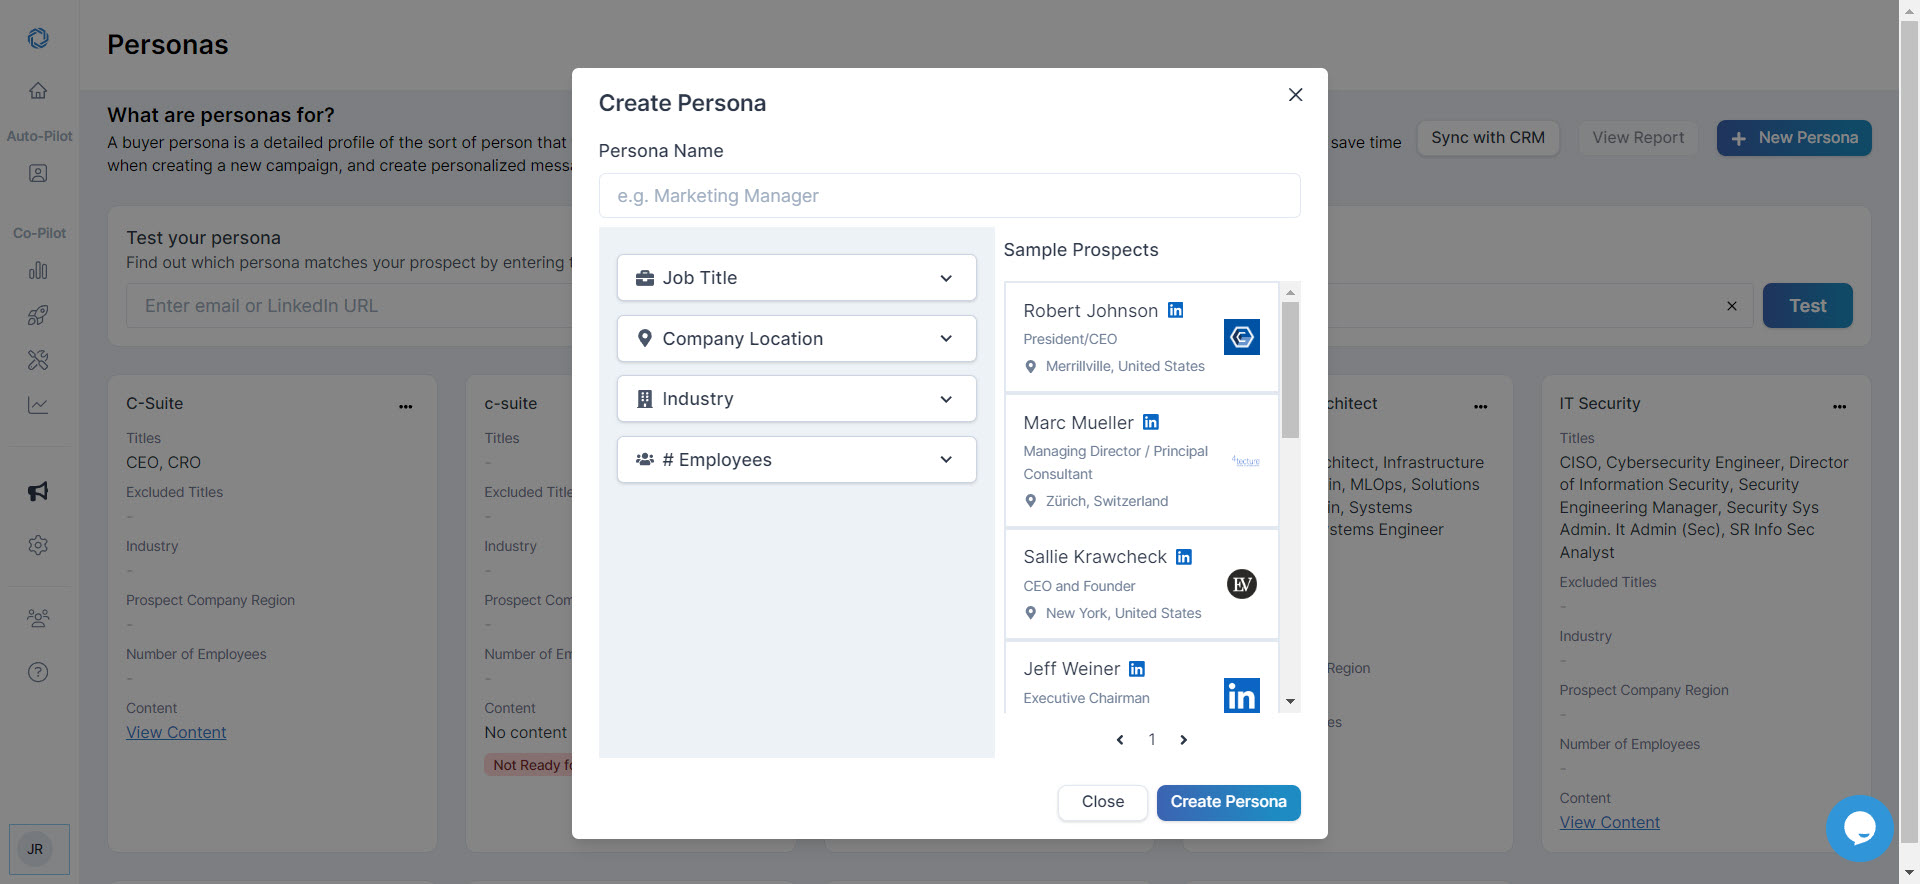
3. Provide your Persona Name.
For this step, feel free to use your preferred naming convention for identifying Personas.
We recommend keeping this consistent among all Persona Cards created, such as Job Title + Function (Ex: Director of Marketing) or Job Title + Industry (Ex: Sales Executive - Healthcare).
4. Next define the Persona by adding all the Job Title(s) commonly associated with the Persona into the Job Titles field of the Persona Builder.
You also have the option to Exclude any Job Titles that should not be matched, or associated, to the Persona.
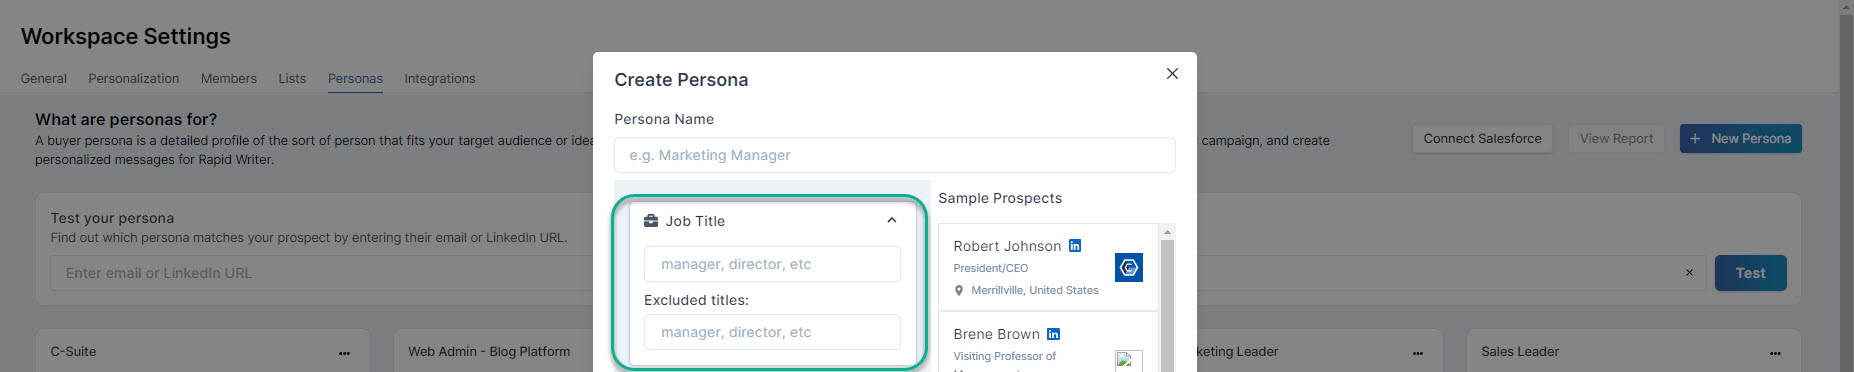
As you're creating and defining your Personas, the Sample Prospects will update on the right side of the Persona Builder window.
These sample profiles are clickable. Clicking them surfaces their LinkedIn Profiles for further review, to ensure you're targeting the right Persona.
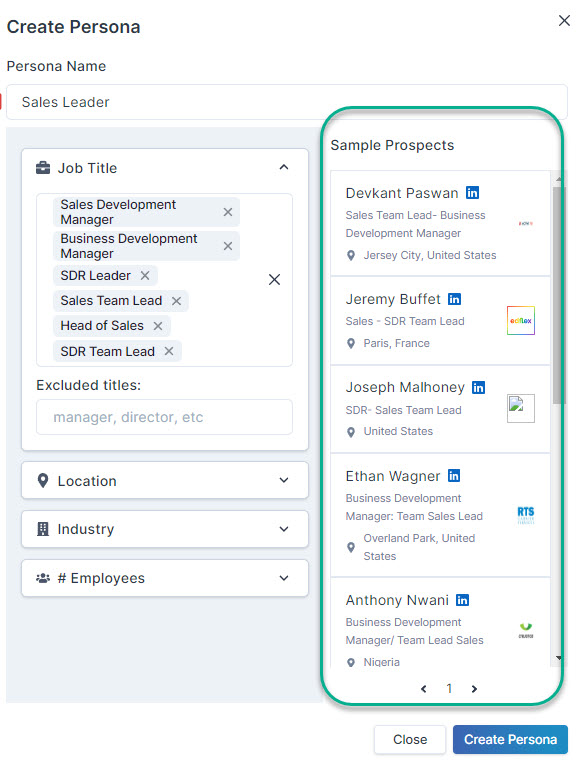
5. While building out the Personas for your Workspace, you have the added opportunity to further refine the Persona if necessary.
Although we recommend defining Personas primarily by Job Title, you have options to include the following specifics:
- Location (Those locations typically used to build out your territory lists for the Personas)
- Industry
- Number of Employees (Company Size)
Important Note: If any of the above specifics are added to one Persona Card, those details must be included ALL Persona Cards that have been created.
For example, if location is specified for one Persona, you must add the location preferences for ALL Persona Cards.
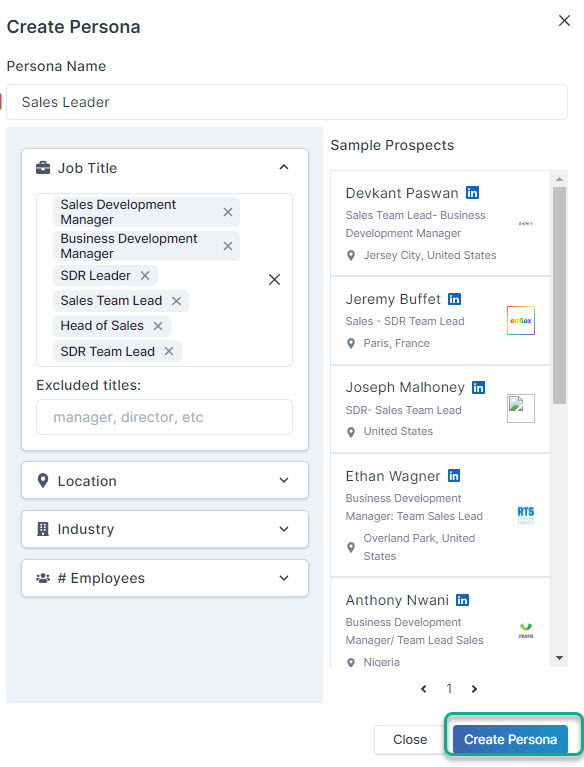
6. When finished providing the details of your Persona, select "Create Persona".
These Persona profiles are able to be accessed by the Rapid Writer in the Chrome Extension, to provide your reps an option for persona-driven message personalization in seconds. You'll want to attach a Pain Point and Value Proposition to the Persona Card to enable the Rapid Writer.
Your Next Steps To Enable the Rapid Writer:
1. Link the new Persona to Pain Points and Value Propositions in your Content Library.
2. Repeat the steps in this article to add any additional Personas to Regie.