Create Personalized Message: Custom Field
The Custom Field provides the opportunity to let Regie.Ai know exactly what you want to discuss with your potential customer.

Dindo Fernandez
Last Update hace 4 meses
Within the Create Personalized Message workflow in Regie's Chrome Extension, you have the opportunity to personalize outbound messages using a Custom Field.
The Custom Field option lets you pinpoint what you'd like to discuss with your prospects and let the magic of Regie.ai do the rest of the work.
This provides you the opportunity to seamlessly incorporate other data that our Prospect Lookup module may not have access to!
Types of data to include in Custom Fields can include, but aren't limited to:
- Making reference to a recent or previous conversation had with the prospect
- Referencing a personal referral or recommendation from a source that encouraged you to reach out to the prospect
- Highlighting a relevant, trending topic with the prospect
- Making an analogy comparing a hobby or special interest that you know the prospect enjoys back to the solution you provide
- Referencing a 10-k report
- Highlight any existing customers or organizations using the product or service
- and much more!
Please see the Ideas for Personalization using the Custom Field for more examples on how to use the Custom Field.
How to access and use the Custom Field in the 3x3 Personalization flow:
1. In the Prospect Profile of the Chrome Extension, access the Personalizer by selecting Create Personalized Message.

2. Select the Custom pill on the Chrome Extension.
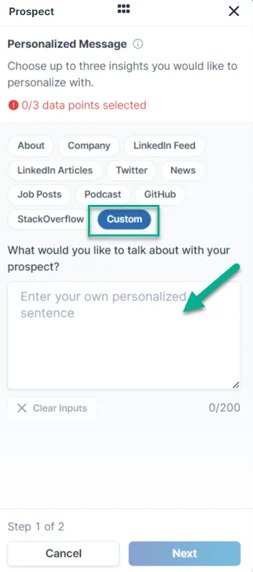
3. Describe or write exactly what you want to talk about to the prospect in the Custom Field. You are allowed up to 200 characters.
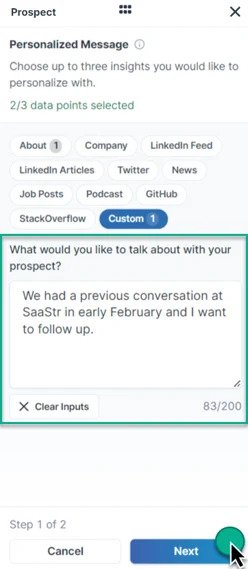
4. Now that the AI has at least one data point to work from, no other data points are required but can be added to the workflow if needed.
To receive optimal first draft suggestions, limit the total data points selected to just 2 (your custom field and one additional data point if necessary).
5. Press Next when ready to move on.
6. Next, in order for the AI to craft a relevant message to the prospect, insert your product or service Value Proposition in 200 characters or less.
A relevant Value Proposition can also be imported directory from your Content Library if saved there as a snippet.
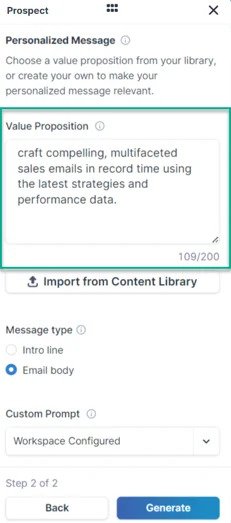
7. Select the Message Type the AI should craft for you. As shown above, you have either the Intro Line or Email Body option.
8. (Optional) Select a Custom Prompt from the drop-down menu to alter the structure/tone of your output based on the provided prompts.
9. Last, select Generate.
10. Regie will then generate 3 personalized email drafts to your prospect; tying in your custom field, any additional data point selected, your solution's value proposition, and a call to action.

Pressing Generate more at the top will create 3 additional email variations. Feel free to press this button as many times as you want until landing on an email that resonates most.
11. Insert or Copy and Paste the message into the body of your email.

12. Select the lightning bolt to generate a contextualized Subject Line.
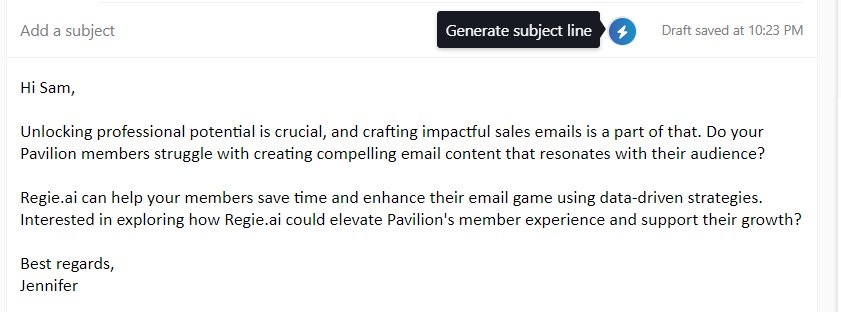
13. Read the email and make any additional adjustments to the message content if necessary.
14. Press send!